Deprecated: Creation of dynamic property Amazon\ProductAdvertisingAPI\v1\com\amazon\paapi5\v1\api\DefaultApi::$headerSelector is deprecated in /www/ballcapmom_658/public/wp-content/plugins/easyazon/vendor/thewirecutter/paapi5-php-sdk/src/com/amazon/paapi5/v1/api/DefaultApi.php on line 61
Deprecated: Creation of dynamic property Amazon\ProductAdvertisingAPI\v1\com\amazon\paapi5\v1\SignHelper::$config is deprecated in /www/ballcapmom_658/public/wp-content/plugins/easyazon/vendor/thewirecutter/paapi5-php-sdk/src/com/amazon/paapi5/v1/SignHelper.php on line 72
Skywalker Trampolines…our backyard is finally complete now that we have ours! A few years ago, our kiddos received a trampoline from Santa! It was perfect (and small). It was a 10 foot, round trampoline with a net enclosure. Just what we needed for our then 4 and 7 year old children. And…it fit perfectly into our backyard without having to destroy too much of the garden area. Santa knew what he was doing.
Well…several years passed, and we quickly discovered that Santa had brought us a trampoline that was perfect for small children, but when big children got on it, the wear and tear began to show! Eventually, the small, pin-hole sized tear turned into a HUGE gaping hole in the middle of the trampoline. What an adventure that was…
As you can see from this pictures, it’s not smart to continue jumping on your trampoline if there is a tear in it! Didn’t take long for that little pin-hole to turn into a giant tear…
So…since our kids are on our trampoline almost every day, we knew we needed to replace the gift that Santa had so generously left our kids. And so the research began. After reading many reviews on the Internet, we decided to go with the Skywalker 12′ Round Trampoline with Enclosure.
The Skywalker Trampoline that we have now is a bit different from any trampoline I’ve seen. These trampolines have a patented enclosure system interlocks the base of the enclosure netting to the jump mat using a button hole feature at each V-ring. This system eliminates all gaps (where fingers and toes can get stuck), and there is no need to thread ropes. This creates a secure jumping area – a jumping area without gaps. Skywalker Trampolines uses a special T-joint at each leg. This type of enclosure connection creates a stable frame that resists twisting and increases the overall stability of your trampoline.
I would say that the thing I like most about this trampoline is that the springs are located outside the jump area – there is no place for feet to slip through springs like there was on our old trampoline. And as the mats got older and came untied, etc… lots of little feet got caught up in the springs.
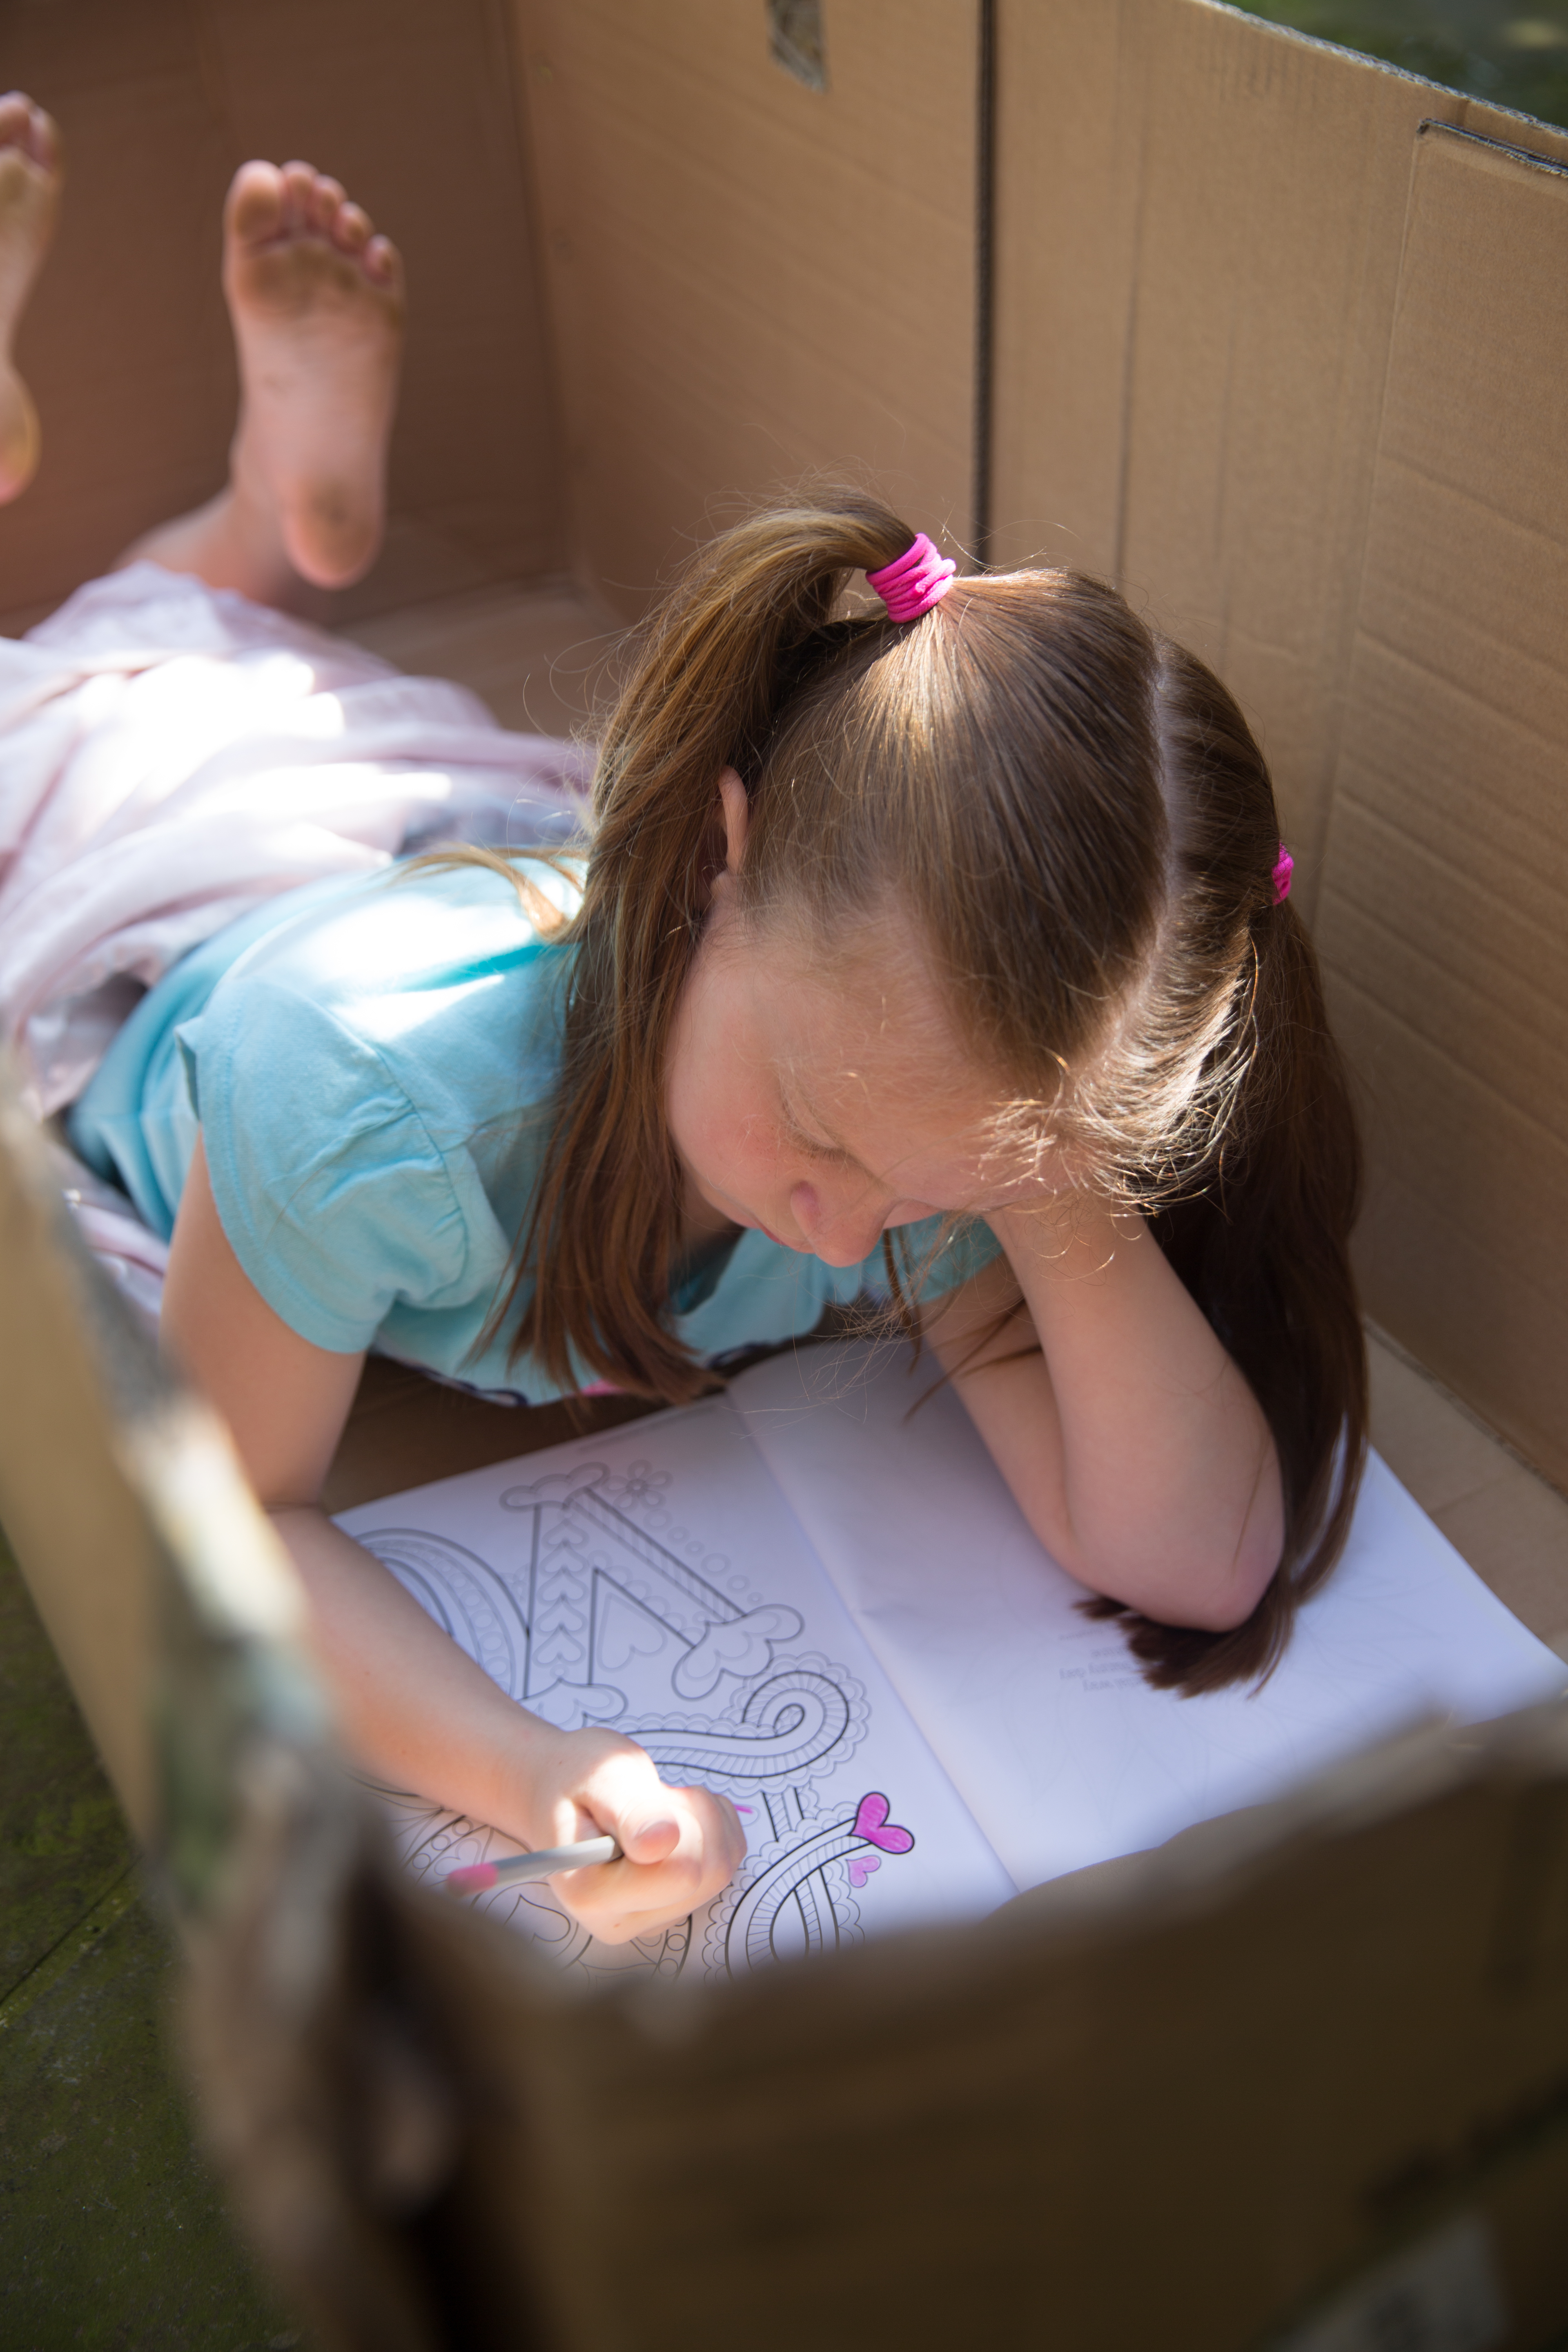
It didn’t take her long to convert the old trampoline box into a little oasis which she played in while the boys worked on putting the new trampoline together!
So…we placed the order for our new Skywalker 12′ Round Trampoline with Enclosure and in just a few short days, it was delivered to our front door in a nice rectangular box. Immediately, Morgan called dibs on the box – she had plans to turn it into a fort!
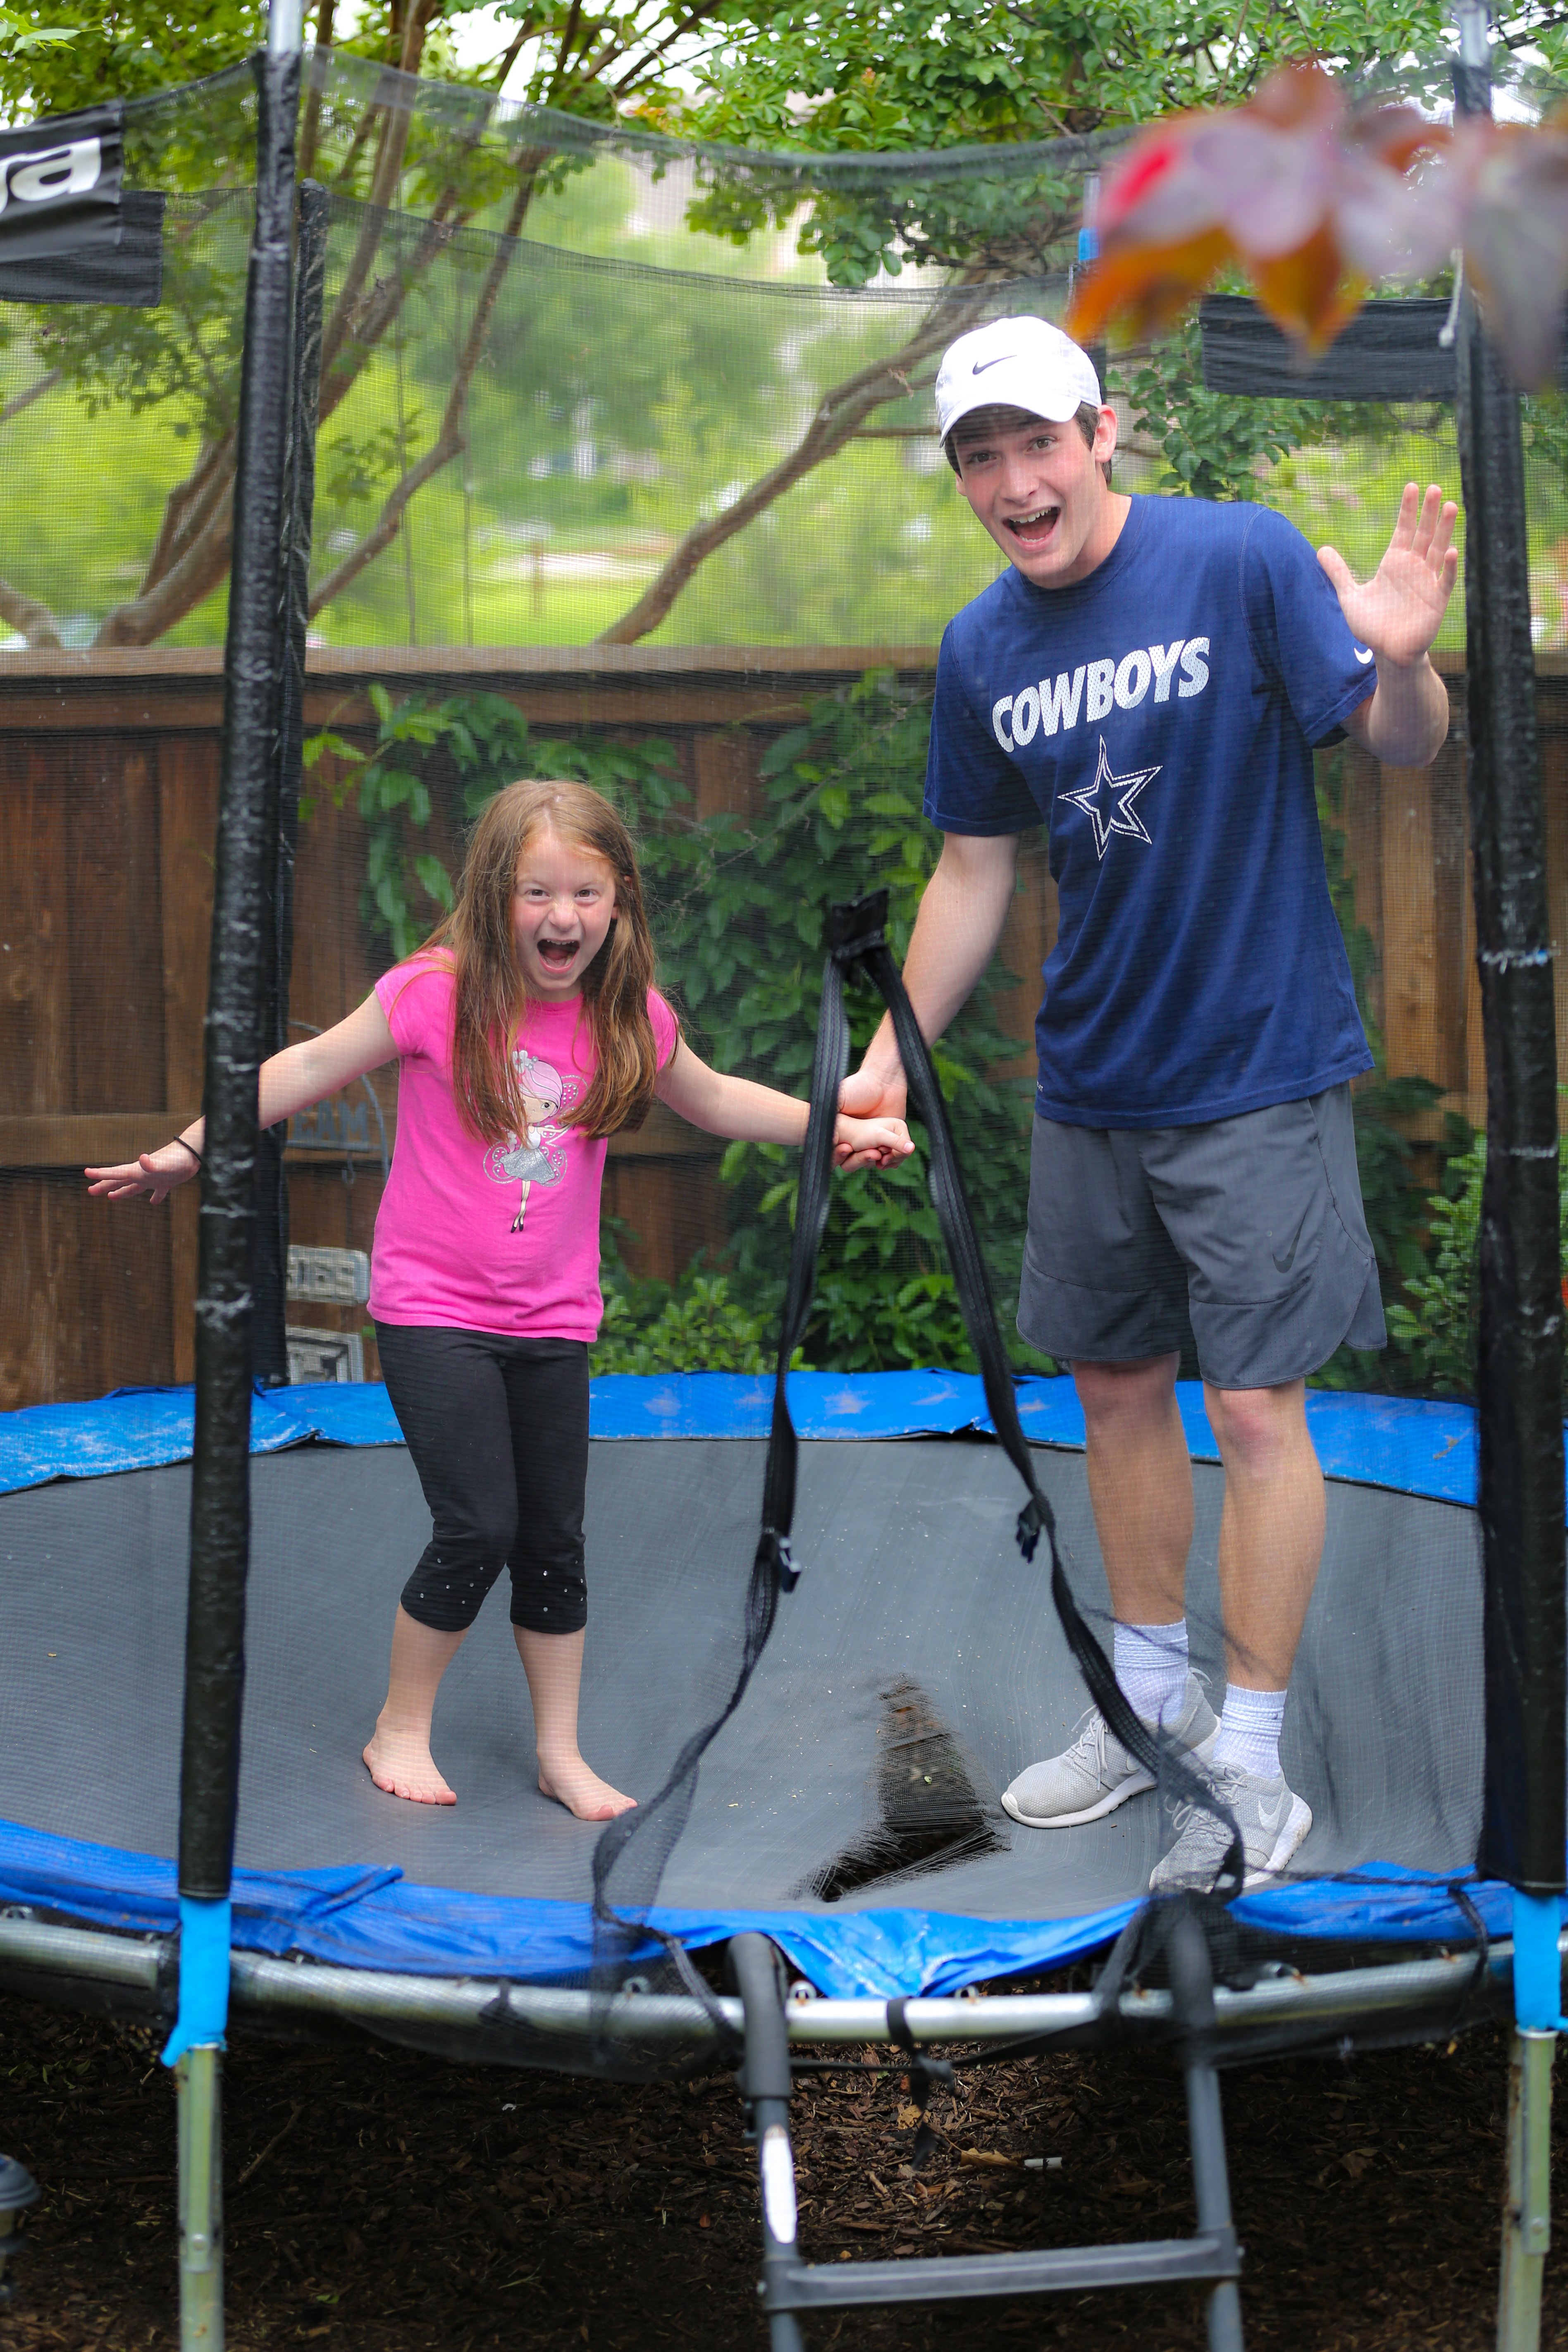
Saturday rolled around, and we began unpacking all of the pieces of this new 12′ trampoline. The kids were thrilled! Dad got up extra early that morning so the trampoline would be finished by lunch time. We were all ready to start jumping and practicing our tricks.
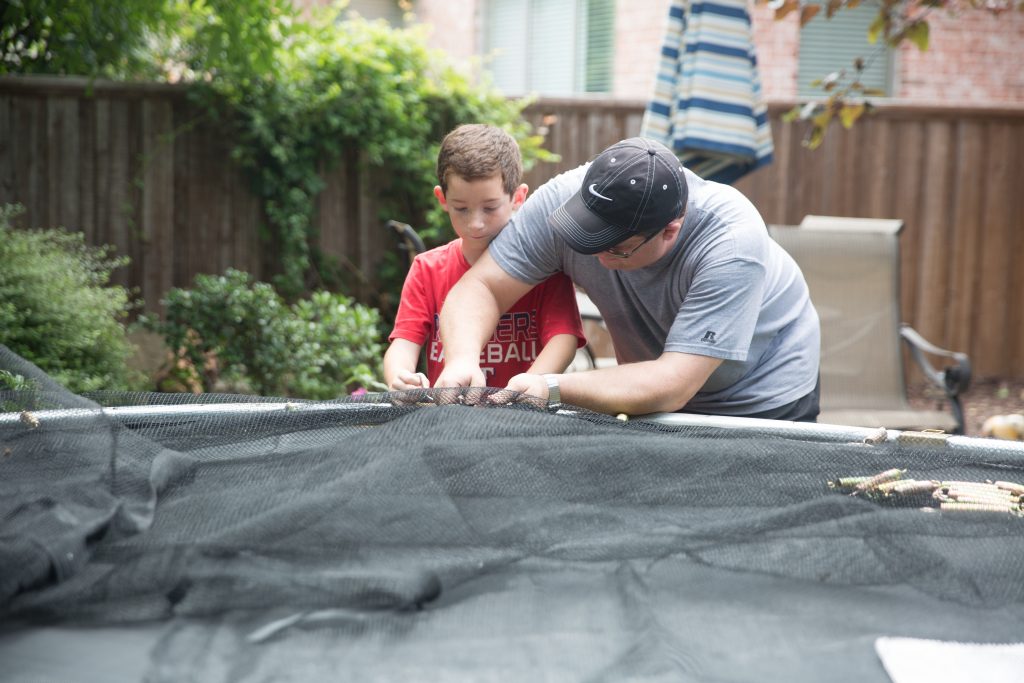
Putting together a trampoline is not a task for the faint of heart. It’s not totally difficult, but as we quickly discovered, if you put the net on inside out, you are going to double the time it takes you to build this thing. For the first hour, the kids were all excited and involved, then for the second hour, it was just me and Mark. Going from spring to spring, stretching and pulling, and connecting all the springs around the outside edge of the trampoline.
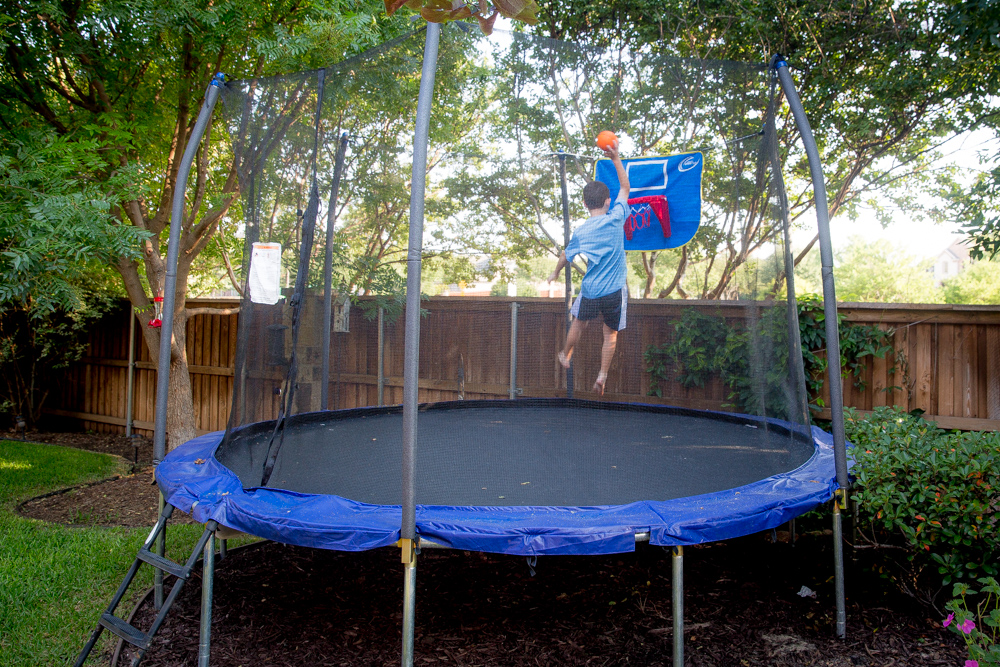
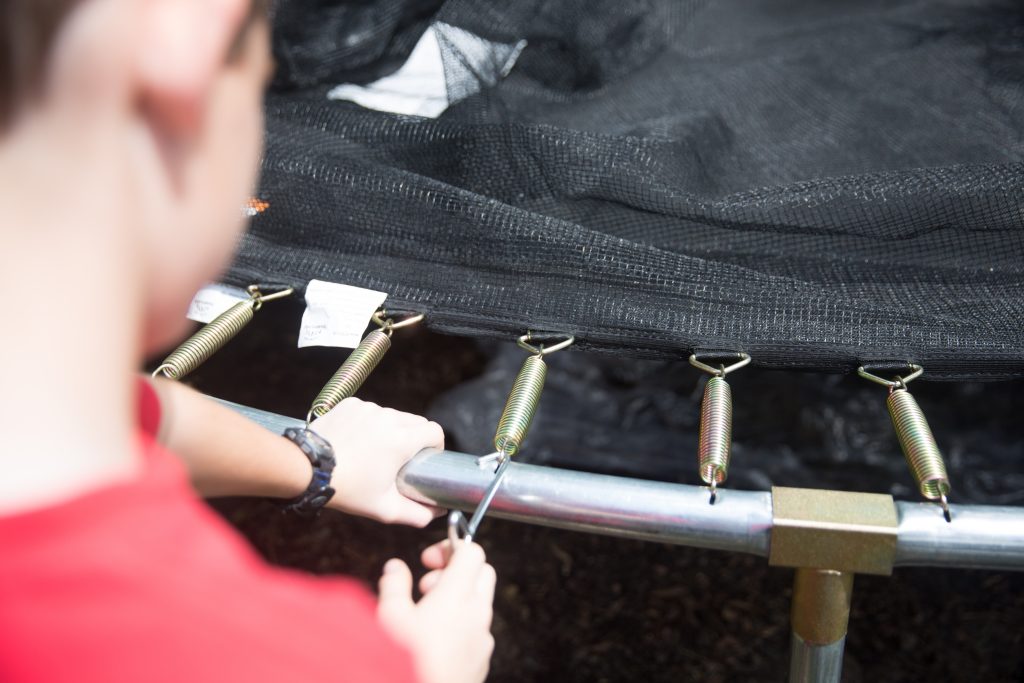
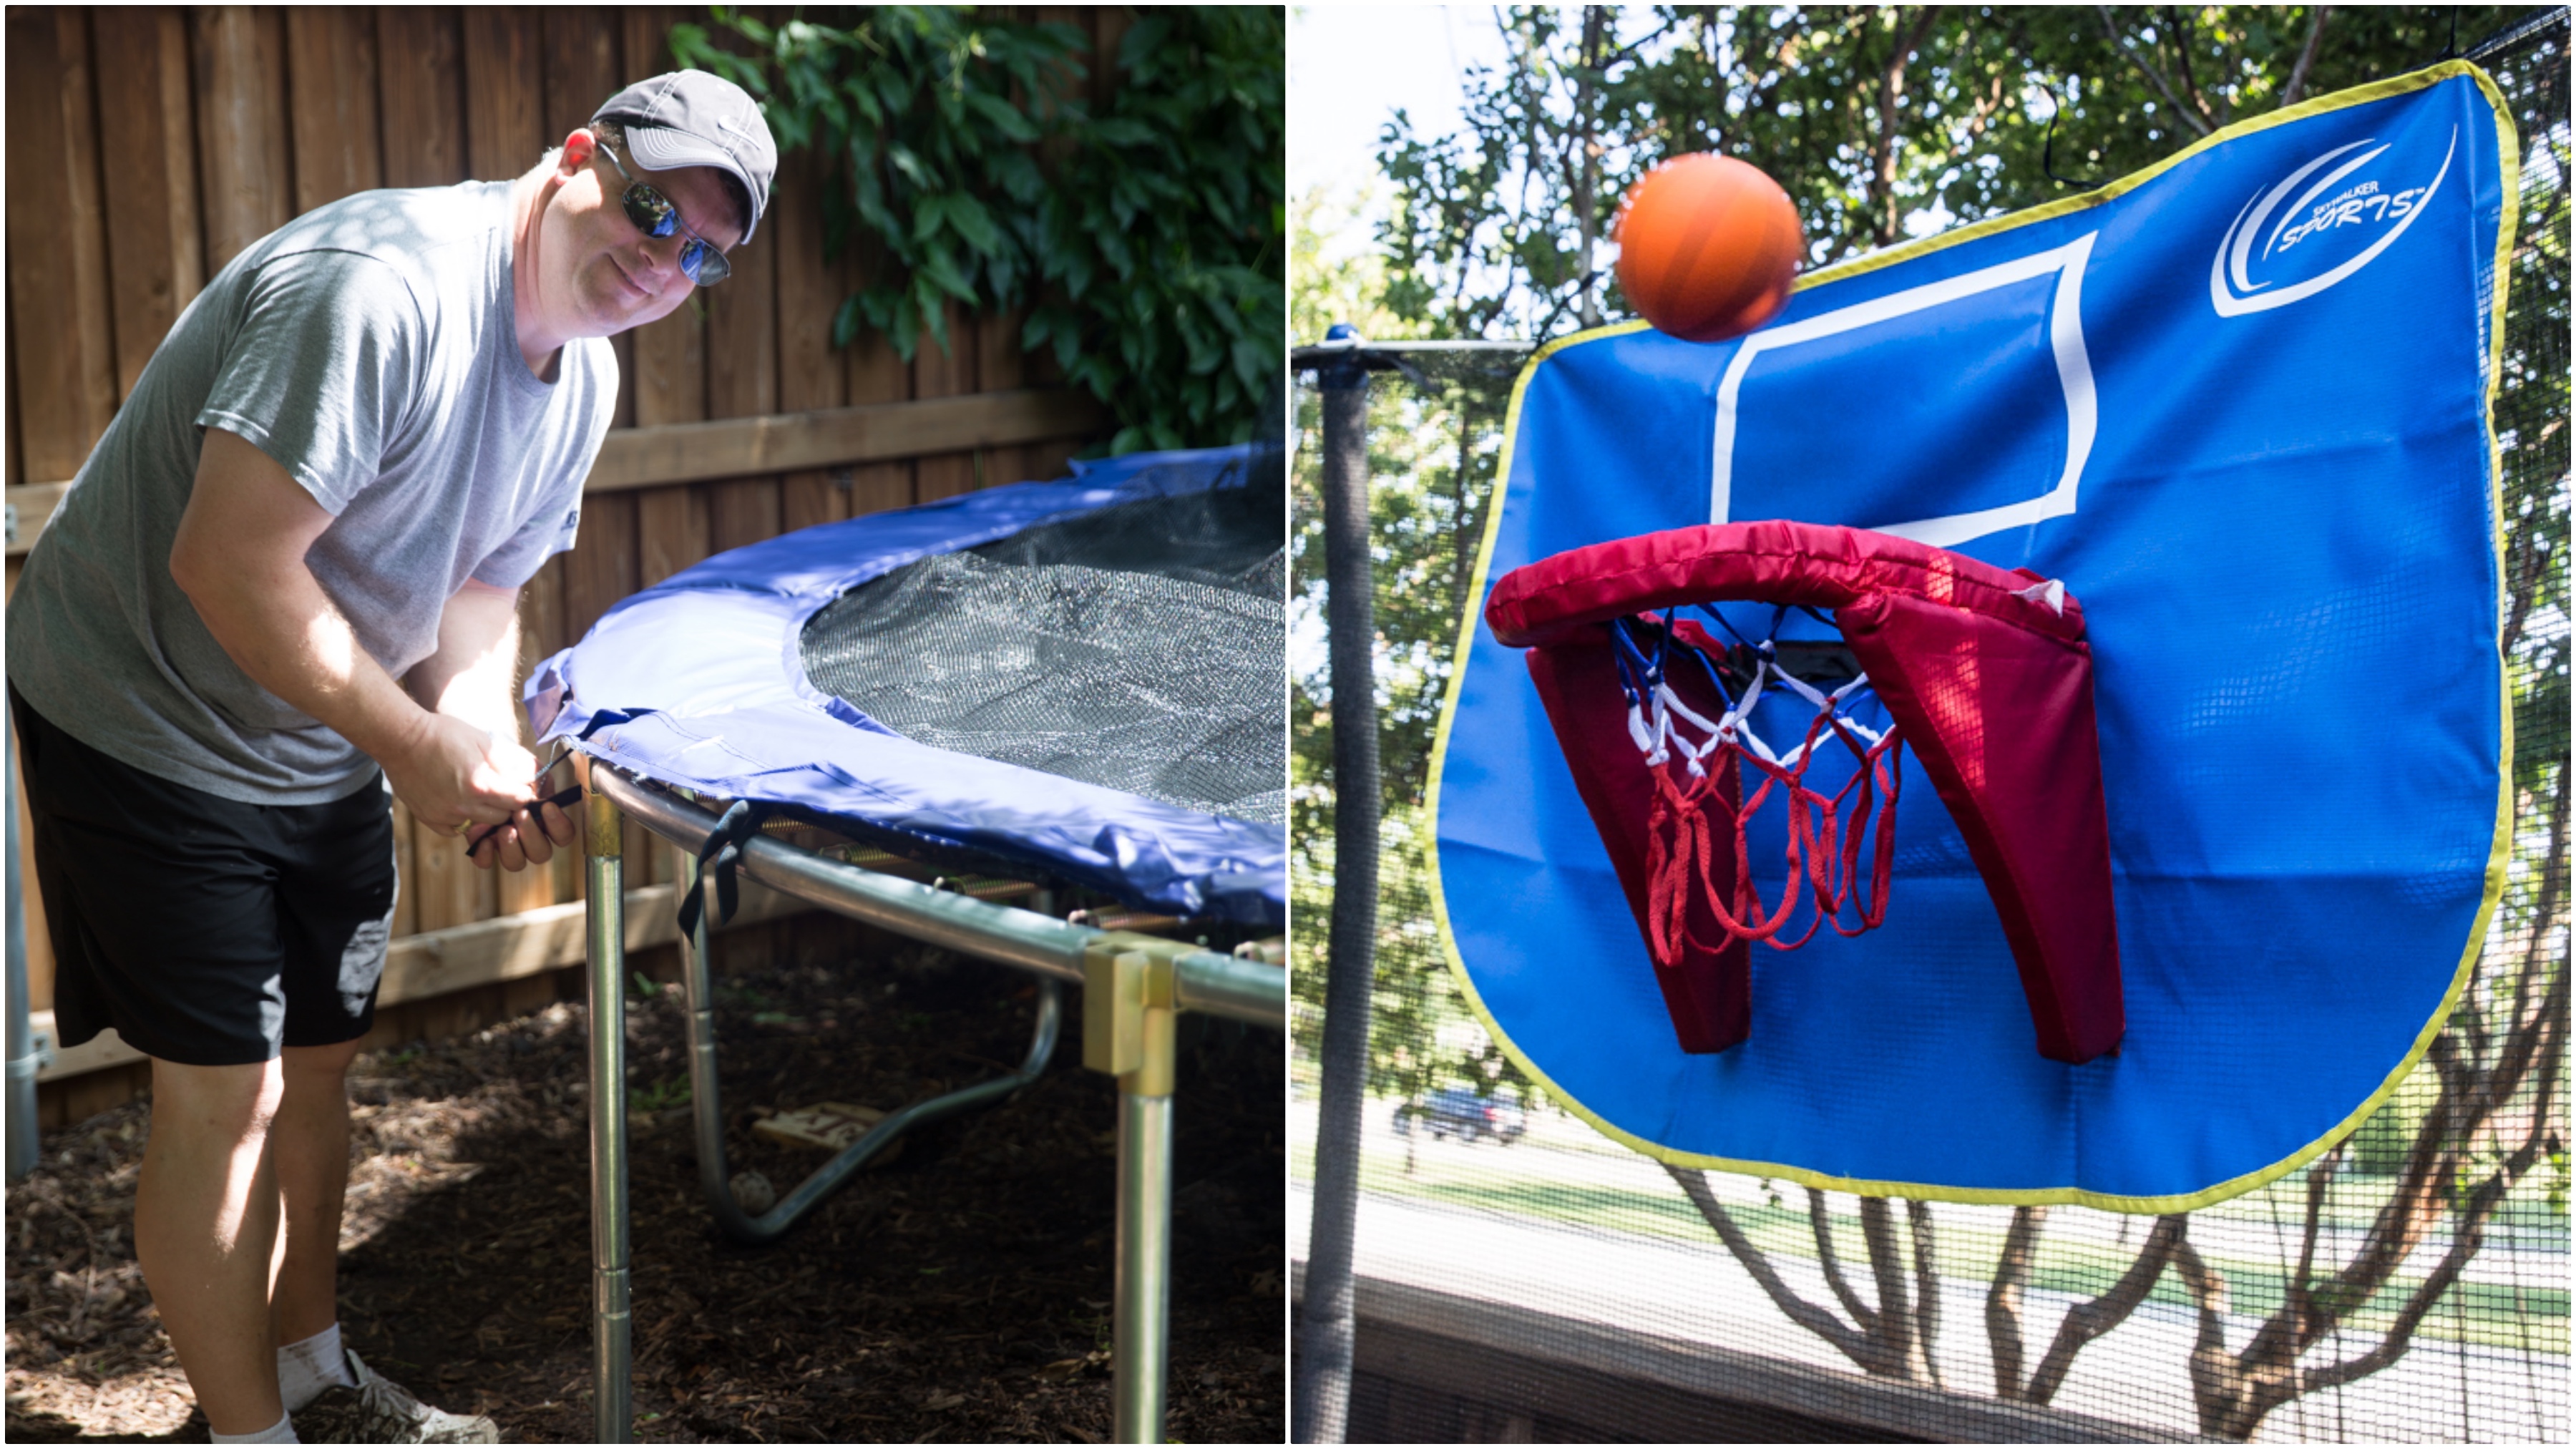
Luckily, they send all the springs and a totally cool little tool that you use to hook the spring from the frame to the actual trampoline. Once I got the hang of it, it was kind of fun. We had our music playing in the background, 2 large Diet Cokes from Sonic, and some beautiful weather! And not only do we now have a trampoline, but we also have a basketball goal for our trampoline (totally cool).
We did not have any trampoline “accessories” on our last trampoline, so the kids were thrilled when they found out this one came with a basketball hoop too! Talk about being able to to some cool slam dunks! Even I got in on the action a little bit. Well worth the extra few bucks it cost to get the basketball hoop! And don’t be surprised if you peek into my backyard and see me playing basketball on the trampoline while the kids are at school. It’s been known to happen from time to time…
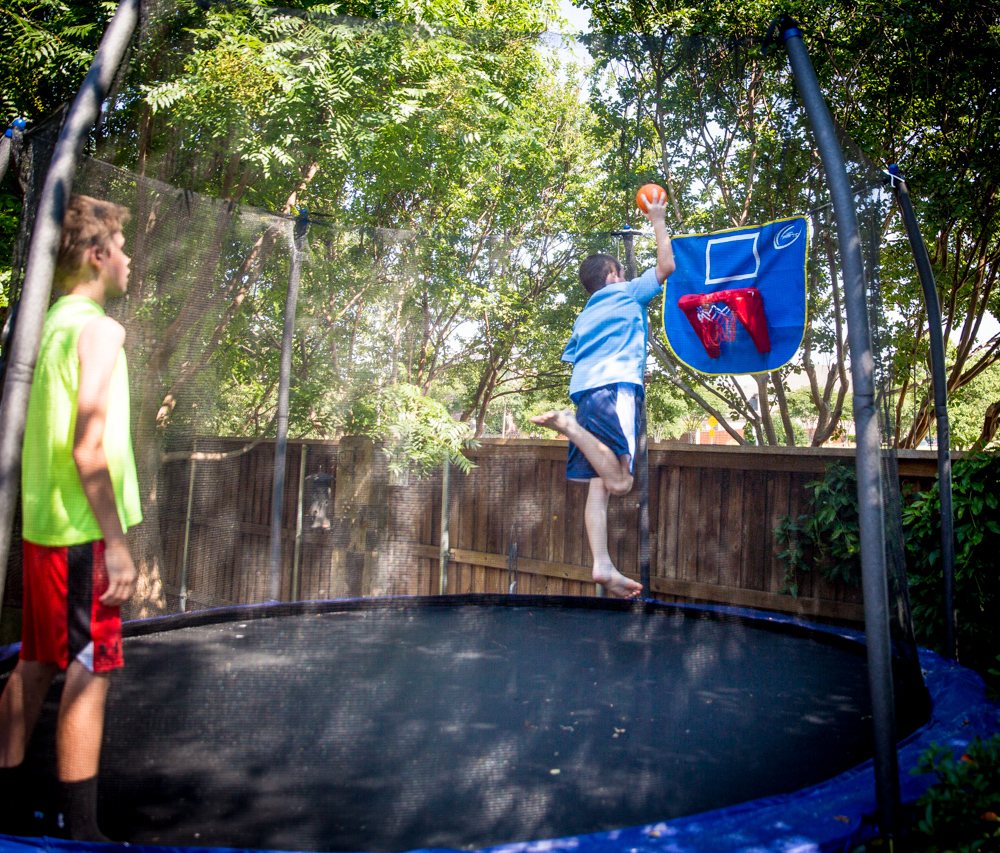
Getting a nice, clear shot through the trampoline net is pretty hard. My camera kept wanting to focus on the net. But I think you get the idea, right?
A Few Words from Mark – Head of Trampoline Construction at Our House
I know that “head of trampoline construction” sounds like a really glamorous job. You might be surprised to learn that it’s not quite as glamorous as you might think. Trampoline assembly is easier than you might think — if you can read the directions. I’m not so good at reading directions (but more on that later).
Trampoline assembly is best when you are not in a hurry. So, for this assembly, I grabbed my outdoor bluetooth speakers and cranked on some Billy Joel tunes. That kind of music is good for lowering blood pressure.
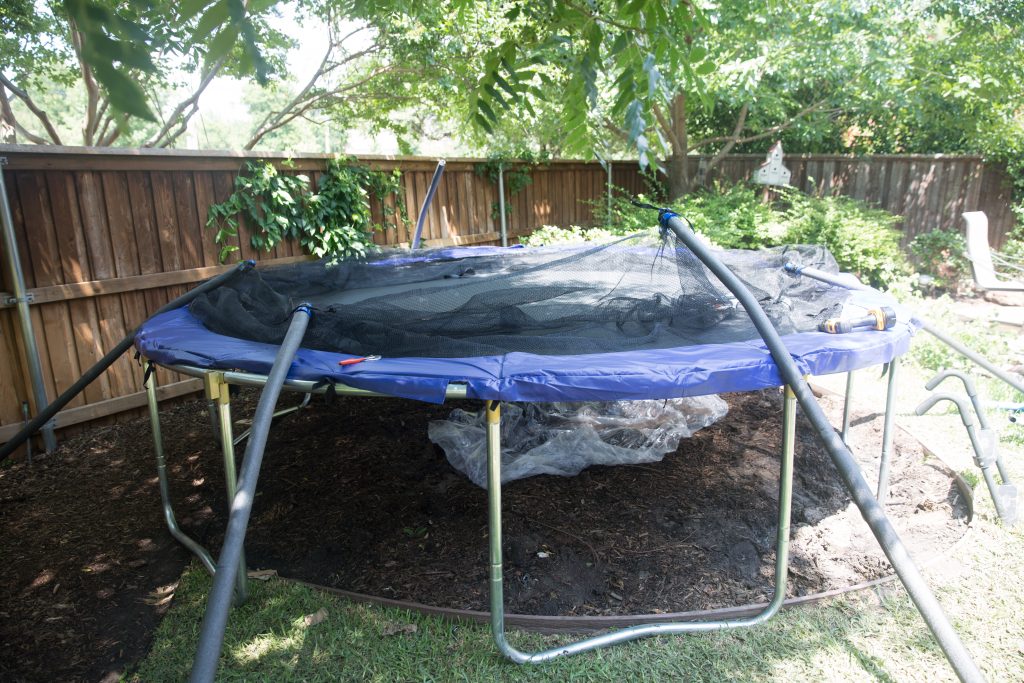
To assemble a trampoline, you need level ground. Unfortunately, our back yard is sloped (for drainage), and drops about eight inches from the front of the trampoline (where you climb in) to the back. To compensate for this, I dug a trench at the front of the trampoline so I could “bury” the leg 8 inches. This made the jumping surface level — which makes the jumpers happy.
Once you have a level surface, the next step is to assemble the base of the trampoline, which includes the legs and makes the round shape that surrounds the jumping surface. Eventually, the springs will attach to that round ring (which is where most of the work comes in). The legs snap together easily and are held in place with screws. This part of the assembly is very simple, and is made a lot easier if you have 2 people available to help with assembly.
Once he figured out how to use this tool, there was no stopping him!
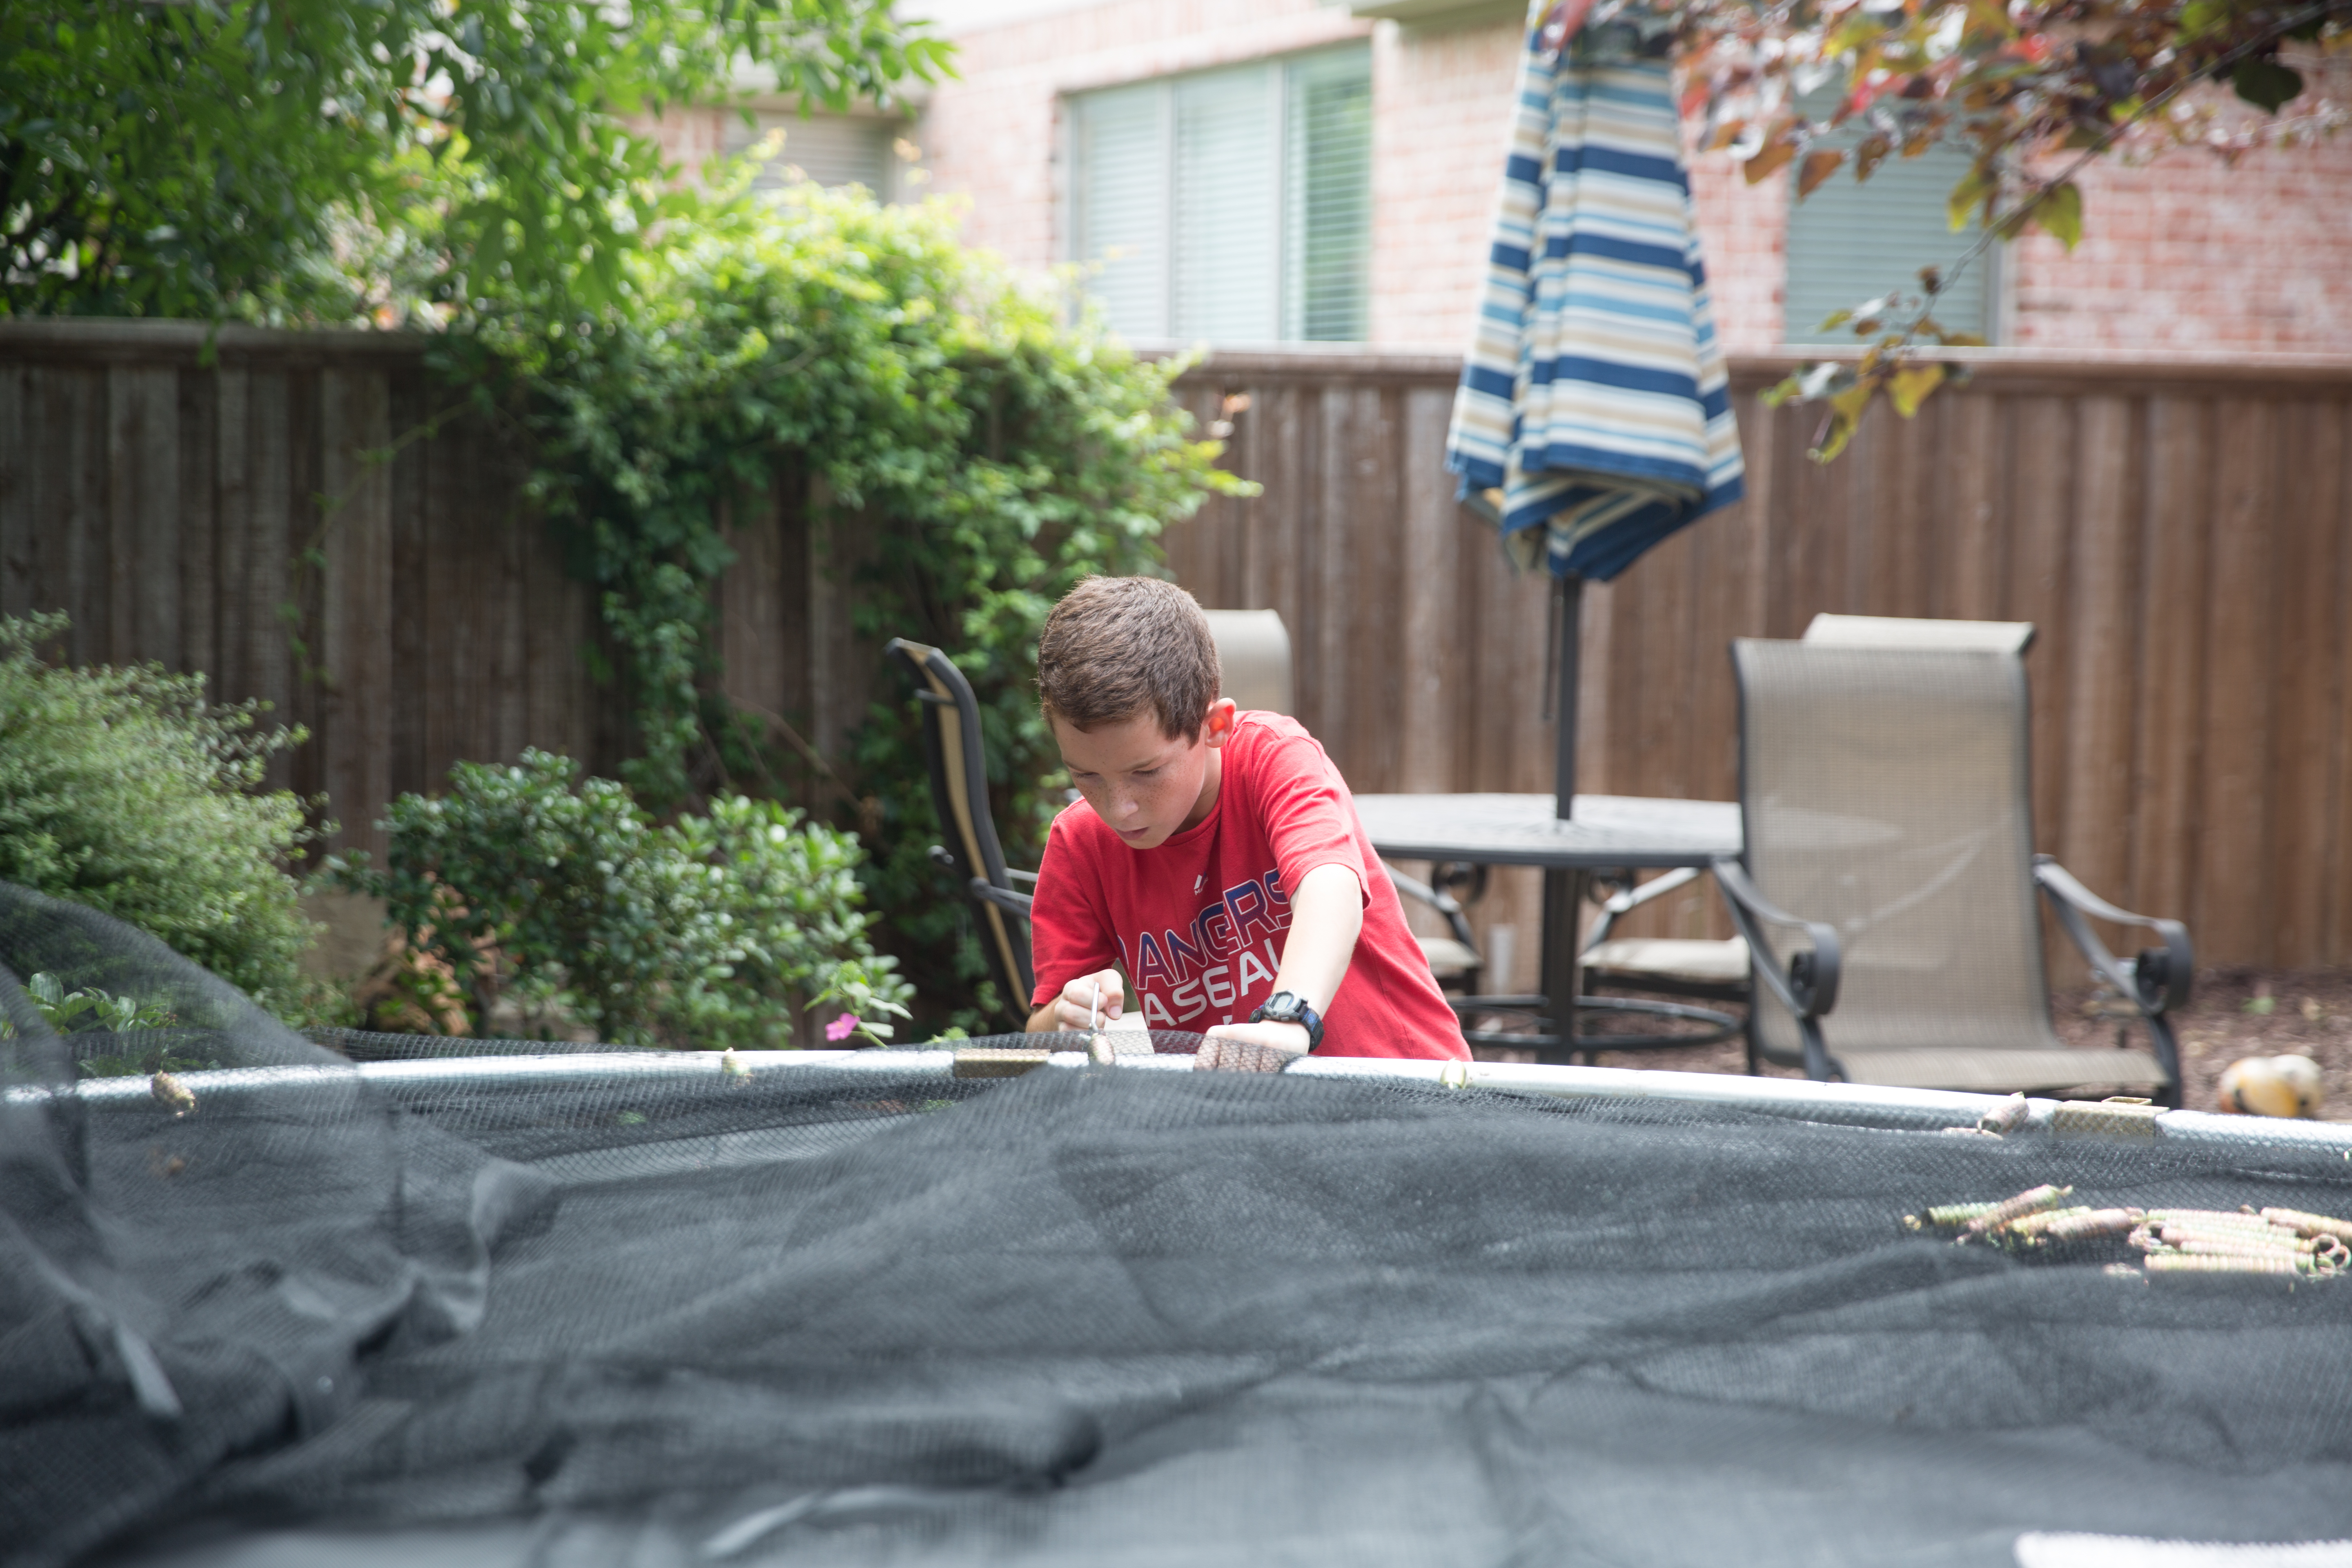
On most trampolines, the next part of the assembly is to attach the jumping surface to the base using dozens of very strong springs. But on this model, the part of the jumping surface that hooks to the springs (eyelets) needs to pass through the net. This is what enable the very safe feature of this model that protects the jumper from the springs. The safety net connects to the jumping surface at every spring eyelet. This is tedious to assemble, but totally worth it when complete. As you can see in the video, it is impossible for the jumper to come in contact with or “fall through” the spring area. Super cool.
Once you thread every jumping surface eyelet through the corresponding hole in the safety net, then you can begin the process of attaching the springs between the mat and the frame. This is the hardest part. It’s not complicated, but there are many springs and attaching them takes a little elbow grease. The entire assembly process shouldn’t take more than 90 minutes if you get it right the first time (not including the time to level the ground).
The problem is that if you aren’t careful (and don’t read the directions properly), you may end up putting the net on backwards. If this happens, you have to remove every spring and star over completely. Sometimes this happens twice. Advice: never drink alcohol when assembling a trampoline. I’m not saying that happened in this case, but it is clearly a bad idea. Seriously, read the directions three times before you begin.
After you properly attach the base, springs net and jumping surface, adding the tall poles and pads that hold the net is a simple matter. All in all, the entire assembly took me three hours (because I did not carefully follow the instructions the first time). You should be able to do it in two.
All in all, this was an easy project. The Billy Joel helped a lot.
On the Skywalker Trampoline website, you will read the following: In 2004 Skywalker Trampolines was created with a belief – a belief that trampolines and other game equipment should be safe and fun keeping children actively engaged in indoor and outdoor activities. Now one of the most recognized and searched for brands in the industry, Skywalker Trampolines continues to design new innovative products using the latest in technology.
If you want to hear a little bit more about their special designs, watch the Youtube Video below from Skywalker Trampolines. It explains (and shows you) how their springs are located outside of the jumping area, it talks about the padding to cover the springs and the trampoline frame, and much more…
One more thing I love about our Skywalker Trampoline is that it is something that we can all enjoy together. The kids are always so thrilled when my husband and I agree to play with them on the trampoline. And for those times that we’re not in the mood to jump with them, we can sit on our patio close by and watch all their tricks. This trampoline was definitely the perfect accessory for our backyard.
Have fun on your trampoline! If you learn to do any cool flips or tricks, be sure and share them! Happy jumping! Until next time…