
Deprecated: Creation of dynamic property Amazon\ProductAdvertisingAPI\v1\com\amazon\paapi5\v1\api\DefaultApi::$headerSelector is deprecated in /www/ballcapmom_658/public/wp-content/plugins/easyazon/vendor/thewirecutter/paapi5-php-sdk/src/com/amazon/paapi5/v1/api/DefaultApi.php on line 61
Deprecated: Creation of dynamic property Amazon\ProductAdvertisingAPI\v1\com\amazon\paapi5\v1\SignHelper::$config is deprecated in /www/ballcapmom_658/public/wp-content/plugins/easyazon/vendor/thewirecutter/paapi5-php-sdk/src/com/amazon/paapi5/v1/SignHelper.php on line 72
What is the Limo Studio for Small Products?
I know you’ve seen my blog post about my Limo Studio Backdrop set up called Photo Backdrops…Why You Might Want One. In this post, I talk about my full-size, portable Limo Studio Photo Studio Background Backdrop Support Stand set up. And I love it! But…many of the products I feature in my blog posts are very small, and only require a small backdrop to take photos.
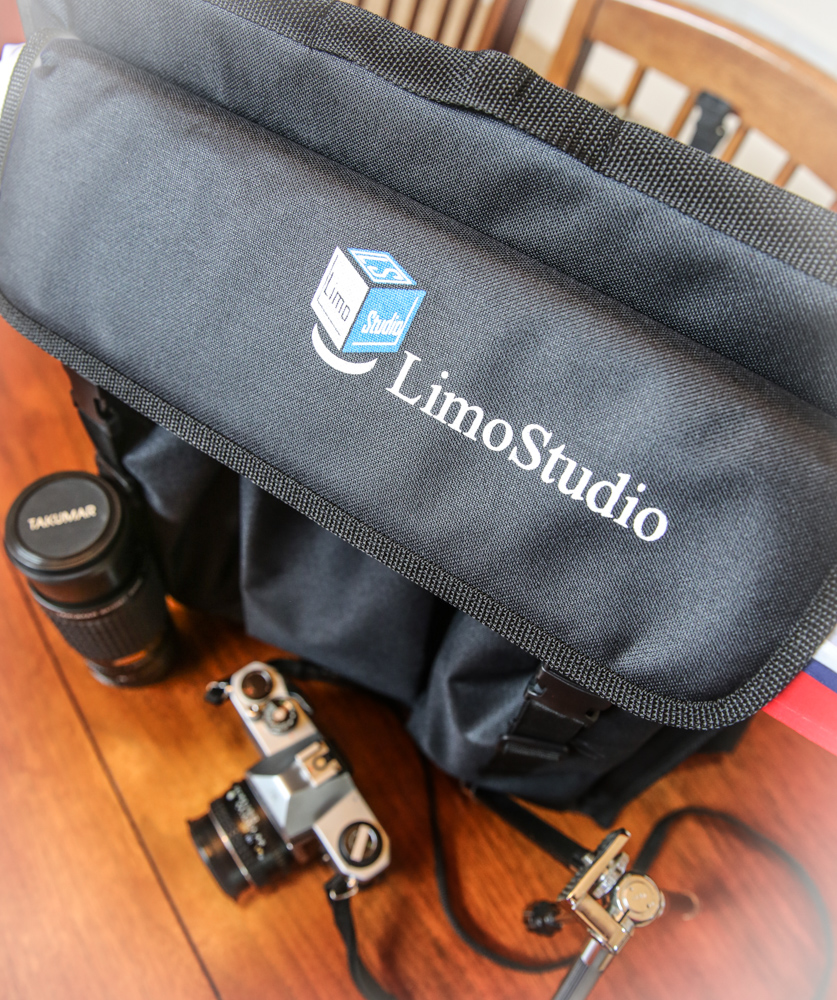
I was getting tired of having to back my car out of the garage so I could set up my full sized Limo Studio set up each time I wanted to photograph a small product that I was blogging about. So, I went online to see what they had for taking photos of small products, and I found my LimoStudio 24″ Folding Photo Box Tent LED Light Table Top Photography Studio Kit! I was so excited! It is just what I needed to get good, clear pictures.
With this little kit, I am easily able to convert my dining room table into a small photography studio for small products and other pictures I need! It’s perfect!
So for about $50, I was all set for some dining room table product photos! I clicked “Add to Cart,” and I patiently waited for my kit to arrive in the mail.
The Studio Kit came with the following:
- (1) x LimoStudio 16
- (4) x LimoStudio Premium 4 Colored Backgrounds
- (2) x High Output Table Top Photography LED Light Stand 600 Lumens
- (1) x LimoStudio Travel Table Top Camera Camcorder Mini Pod
- (1) x Cell Phone Clip Holder for iPhone 6 5S 5C 5 Samsung Galaxy S5 S4
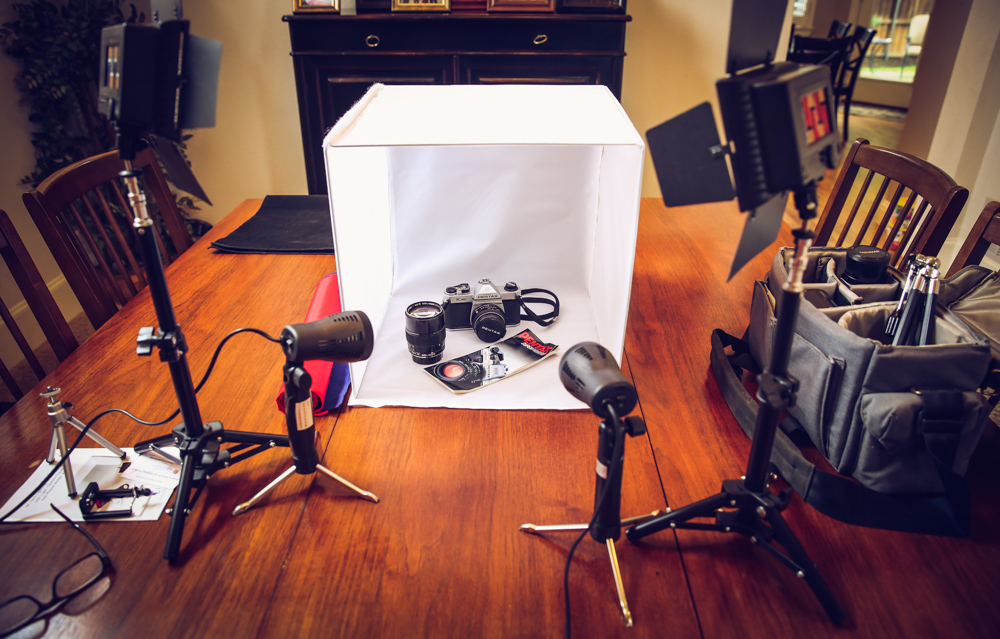
This is such a simple idea, but solves a lot of problems if you are trying to take “clean” shots of products you are promoting or blogging about. The box blocks anything that might be found in a background of any photo. In my house, this means Littlest Pet Shop characters, Shopkins, Legos, and a passing dog or cat!
Typically, I set my LimoStudio up on my dining room table, and because it is close to a window, I rarely need to use the included lights. However, they are perfect for highlighting a product if you need to.
This has proven to be a very efficient way for me to capture images for my blog posts – instead of having to clean up the area around where I’m taking the picture, I have this crisp, clean, LimoStudio Photo Box with a variety of background colors. I typically use black or white for most of my images, but it also comes with red and blue.
Are There Rules for Taking Photos of Products?
If you are just getting started taking photos of products for your website, you might want to read the article titled Common Mistakes in Product Photography and How to Avoid Them. It has several helpful hints to help get you started on the right track.
Another great article called The Ultimate DIY Guide to Beautiful Product Photography, offers up advice on what camera settings to use, what lenses work best for product photography, and even how to re-touch your images before you post them. It goes into great detail, and has wonderful information for people just starting, as well as some good reminders for seasoned product photographers.
According to this article, you will need the following items for a successful product photo shoot:
- Camera
- Tripod
- White background
- White Bounce Cards (Foamcore)
- Table (or work surface)
- Tape or Clamps
- A room with GREAT light
Now…out of these items, I use the camera, white background, a good work surface, tape and clamps (depending on the product), and I have a room with lots of natural light! And don’t worry, there are many ways to set up your own product photography area in your home – I have done it both ways.
I have created my own little LimoStudio using cardboard boxes and colored paper, and I have used the LimoStudio – both the portable version and the stand-up version.
Because there is always a lot going on in my house, I just found it easier to use the LimoStudio Table Top Kit. Once you are finished with it, you just fold it down, pack the lights away in the slots for lights and other accessories, and toss it in your closet! At least that’s what I do… Until I need it again.
Some days, I wish I could convert one of the rooms in my house to my little photography/blogging room! You know…that way I wouldn’t have to clean up after each photo shoot!
What is a Green Screen?
Another thing you can do with this is buy a small piece of green fabric for your studio kit and do some green screening with it. If you’re not sure what that is, think about your local weather on the news each night… Most everyone has seen a meteorologist use a green screen to report the weather.
Meteorologists stand in front of the green screen, and point out specific parts of the forecast with visuals they use to show us things such as the 5-day forecast or the current radar.
I’ve included a link to a LimoStudio Green Screen Kit. It is called the LimoStudio Photo Video Studio Light Kit.
This kit includes the following:
- Chromakey Studio Background Screen (Green Black White)
- (3) Muslin BackDrops
- Umbrella
- Softbox
- Lighting Diffuser Reflector
- Heavy Duty Carry Bag
So, basically, Green Screen means that you can take a photo of your product, and then create any background you want to for it. Pretty cool, right? I am not a Photoshop expert, so I don’t have any experience with this personally, but it sure sounds like fun.
If you’re interested, you can get quite a bit of information on it from the B&H Photo Video. On their YouTube channel, they tell you everything you need to know to get started with this. Just click the title, and it will take you to the B&H Green Screen Basics Tutorial. Please let me know about your Green Screen experience! I’m totally interested in trying it at some point, just haven’t yet.
Also, I found a really great article on the Picture Correct Website. It has a short video on how to set up a really inexpensive area to shoot product photos. It lists all the materials you need, and after watching the video and grabbing a few things, you could easily be up and running for just a few dollars! Let me know how it goes if you choose to try to “do-it-yourself”!
So…there you have it. If you are taking product photos for your blog, or if you just like playing around with photography like I do, this is a fun little kit to add to your camera/photography treasures. Like I said…I’ve done it both ways…on the cheap, and using this kit.
This kit is perfect for me. How do you take photos of your products? I’d love to hear from you! Goodluck, and like always, let me know what works for you. Until next time…

This is a great article to read. Thank you for your honest endeavor. I will take help from this article to start my own product photography. Hope to get a satisfactory result. Cheers.